
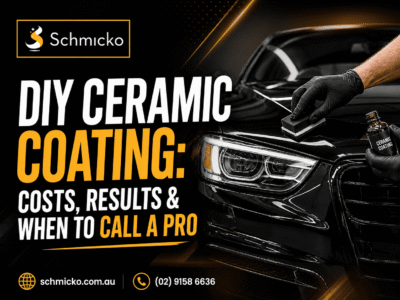
DIY Ceramic Coating: Costs, Results & When to Call a Pro
Table of Contents[Hide][Show]
- Key Takeaway
- What Is Ceramic Coating DIY and Why Are More Car Owners Applying It Themselves?
- How Does DIY Ceramic Coating Work on Your Car’s Paintwork?
- Why Washing, Decontamination, and Polishing Matter Before Ceramic Coating
Step-by-Step Process to Apply Ceramic Coating Yourself at Home+−
- 1. Wash the car properly
- 2. Remove embedded environmental contaminants like tree sap, road salt, and industrial fallout
- 3. Polish the paint (comprehensive paint corrections including swirl mark removal and defect elimination)
- 4. Wipe the panels with panel wipe or IPA
- 5. Apply the ceramic coating
- 6. Level the coating with a microfiber towel
- 7. Let the coating cure properly
- When DIY Ceramic Coating Makes Sense for Your Car
- Conclusion
- Hi, I’m David
Ceramic coating DIY has become a popular option for car owners who want long-lasting paint protection without paying for a professional detailer. A ceramic coating is a liquid polymer product containing silicon dioxide (SiO₂) that chemically bonds with your vehicle’s paintwork at the molecular level, forming a durable, hydrophobic layer that creates a slick, glass-like barrier against environmental contaminants. This layer improves gloss, protects the surface from environmental contaminants like tree sap, road salt, and industrial fallout, and makes routine car care much easier.
Many drivers today choose DIY ceramic coating because kits are widely available and relatively affordable. Instead of spending thousands on a professional coating, enthusiasts can apply ceramic coating themselves at home. However, the results depend heavily on preparation, proper technique, and realistic expectations.
This guide explains how ceramic coating DIY works, what it costs, and when it’s smarter to call a professional detailer instead.
Key Takeaway
DIY ceramic coating can be a great way to protect your car’s paint while saving money. However, the results depend on preparation, product quality, and the person applying the coatingprotect your car’s paint while saving money your car’s paint while saving money. However, the results depend on preparation, product quality, and the person applying the coating.
You may also want to read: Graphene vs Ceramic Coating in Australia: Which Paint Protection Wins | Why Car Paint Protection Is a No-Brainer for Australian Drivers
Here are the main points to remember:
- DIY ceramic coating kits cost far less than professional services.
- Proper preparation such as washing, decontamination, and polishing is essential.
- DIY coatings usually last 1–3 years, while professional coatings may last 4–7 years or longer.
- Professional coatings include comprehensive paint corrections including swirl mark removal and defect elimination, controlled environments, and warranty protection.
If your car has good paintwork and you enjoy hands-on car care, DIY ceramic coating can work well. If your car is expensive or has paint defects, a professional coating may be the safer choice.
What Is Ceramic Coating DIY and Why Are More Car Owners Applying It Themselves?
Ceramic coating DIY means applying a protective ceramic coating to your car’s paint yourself rather than hiring a professional detailer.
Ceramic coatings are liquid polymers that contain silicon dioxide (SiO₂). Once applied, the coating chemically bonds with your paint to deliver maximum protection and forms a slick, hydrophobic layer. This layer improves gloss, protects against UV rays, and reduces the accumulation of dirt and grime.
Many car owners are now choosing DIY ceramic coating because:
- Kits are affordable and widely available.
- The process can be done at home with basic detailing tools.
- It gives enthusiasts more control over their car care routine.
- Results are noticeably better than traditional wax or sealant.
DIY ceramic coating also appeals to car enthusiasts who enjoy detailing as a hobby. With patience and proper preparation, a DIY coating can produce impressive gloss and water beading while offering strong paint protection.
How Does DIY Ceramic Coating Work on Your Car’s Paintwork?
DIY ceramic coating works by bonding a thin layer of silicon dioxide to your car’s clear coat, creating a hydrophobic protective barrier.
This nano coating fills microscopic pores in the paint surface. Once cured, it forms a slick, glass-like layer that repels water and environmental contaminants like tree sap, road salt, and industrial fallout.
The coating improves several aspects of paint protection:
- Hydrophobic properties – water beads and slides off the paint
- Improved gloss and slickness – paint looks deeper and shinier
- Protection from environmental contaminants like tree sap, road salt, and industrial fallout – dirt, bird droppings, and grime are less likely to stick
- Ease of maintenance – you’ll spend 50% less time washing while achieving better results and easier
Although ceramic coating doesn’t make your car scratch-proof, it provides a noticeable upgrade compared to waxes and sealants. It also lasts significantly longer when properly maintained.
DIY Ceramic Coating vs Professional Ceramic Coating: What’s the Real Difference?
The main difference between DIY ceramic coating and professional ceramic coating is durability, preparation, and application quality.
DIY coatings are designed for easy home use, while professional coatings use stronger formulas and are applied by experienced detailers in controlled environments.
Quick Comparison
| Feature | DIY Ceramic Coating | Professional Ceramic Coating |
| Cost (refer to table below) | $700 – $1200 | $990 – $1900 |
| Durability | 1–3 years | 3–5+ years |
| Paint Preparation | Basic prep by owner | Multi-stage comprehensive paint corrections including swirl mark removal and defect elimination |
| Warranty | Rare | Long warranty & support included |
| Coating Quality | Entry Level | Professional Performance Grade |
Why Professional Coatings Last Longer
Professional detailers perform proper comprehensive paint corrections including swirl mark removal and defect elimination before applying the coating and work in controlled conditions. This ensures your coating achieves maximum adhesion and longevity with the paint, producing stronger gloss, hydrophobic protection, and durability. Also, professional grade coatings reserved for experienced and accredited car detailers are generally hard to correct if done wrong. This is why they are reserved for professionals and why they are more durable.
When DIY Still Makes Sense
DIY ceramic coating can still provide solid paint protection when done correctly. It works best for:
- car owners on a budget
- vehicles with good paint condition
- enthusiasts who enjoy hands-on car care
With proper washing, polishing, and careful application, DIY coatings can still deliver great gloss and easier maintenance for daily drivers.
Ceramic Coating DIY Cost Breakdown: What You’ll Actually Spend
DIY ceramic coating typically costs between $150 and $200 for the coating kit alone.
Many beginners assume the only cost is the coating bottle. In reality, several products are needed to achieve proper results.
Typical DIY costs
| Item | Estimated Cost |
| Ceramic coating kit | $150 – $200 |
| Clay bar & iron remover | $20 – $50 |
| Microfiber towels | $20 – $40 |
| Machine DA polisher + Foam Pads + Liquid Polish | $300-$500 |
| Pressure washer + hose extension | $200-$400 |
Professional ceramic coating services cost much more because they include labour, advanced coatings, comprehensive paint corrections including swirl mark removal and defect elimination, and warranties.
Although DIY is cheaper upfront, professionals often deliver longer-lasting protection.
Tools and Products You Need Before You Apply Ceramic Coating Yourself
Applying ceramic coating properly requires more than just the coating bottle. Proper preparation tools are essential.
Essential tools
- Microfiber towels
- Applicator pads
- Ceramic coating bottle
- Panel wipe or IPA solution
- pH-neutral car wash
- Pressure washer + hose extension
- Large microfiber drying towel
Preparation products
- Clay bar for removing environmental contaminants like tree sap, road salt, and industrial fallout
- Iron remover for decontamination
- Polishing compounds
- Dual-action polisher
Optional tools for better results
- Extra lighting
- Foam cannon
- Grit Guard
Using proper tools improves the application process and helps produce the best results from your DIY ceramic coating.
Why Washing, Decontamination, and Polishing Matter Before Ceramic Coating
Proper preparation is the most important step in ceramic coating DIY.
If the paint surface contains environmental contaminants like tree sap, road salt, and industrial fallout, swirl marks, or leftover wax, the coating will bond poorly. This can reduce durability and cause uneven gloss.
Washing removes dirt and grime from the paint. Decontamination using iron remover and clay bars removes embedded environmental contaminants like tree sap, road salt, and industrial fallout that washing alone cannot remove.
Polishing is equally important. Paint correction removes swirl marks and minor scratches so the coating locks onto a smooth surface. If you skip polishing, those imperfections become permanently sealed beneath the coating.
For the best results, always prepare the paint thoroughly before applying ceramic coating.
Step-by-Step Process to Apply Ceramic Coating Yourself at Home
Applying ceramic coating DIY isn’t difficult, but it does require patience and proper preparation. The coating itself takes only a short time to apply — most of the work happens in cleaning and preparing the paint properly. If you rush the prep stage, the coating won’t bond well and the results won’t last.
Follow these basic steps to apply ceramic coating at home.
1. Wash the car properly
Start with a thorough wash using a pH-neutral car shampoo. This removes dirt, dust, and road grime from the paint. Use a microfiber wash mitt and rinse the whole car well so no debris remains on the surface.
2. Remove embedded environmental contaminants like tree sap, road salt, and industrial fallout
Even after washing, tiny particles such as brake dust and metal fallout can still stick to the paint. Use an iron remover followed by a clay bar to pull these environmental contaminants like tree sap, road salt, and industrial fallout out. This step leaves the paint surface smooth and ready for coating.
3. Polish the paint (comprehensive paint corrections including swirl mark removal and defect elimination)
If the paint has swirl marks, light scratches, or dull spots, polishing helps restore the surface. A dual-action polisher and polishing compound can remove these defects so the coating locks onto clean, smooth paint. Even brand new cars will often come with masked imperfections. This is why it is recommended to do a proper decontamination wash for a true reveal.
4. Wipe the panels with panel wipe or IPA
Before applying the coating, wipe the paint with IPA (isopropyl alcohol) or panel wipe. This removes oils, polish residue, or wax that could stop the coating from bonding properly.
5. Apply the ceramic coating
Apply the coating in small 2×2 sections using the supplied applicator. Spread it in a cross-hatch pattern so the coating covers the surface evenly and simply buff off any excess during the flashing stage.
6. Level the coating with a microfiber towel
After a short flash time, gently wipe the panel with a clean microfiber towel. This removes excess product and prevents high spots or streaks.
7. Let the coating cure properly
Once the whole car is coated, allow it to cure for at least 24 hours. Keep the vehicle dry and out of rain during this time so the coating can harden properly. The car should reach maximal hardness and gloss after its curing period which is typically 1-2 weeks.
Taking your time with these steps will give you a smoother finish, better gloss, and longer-lasting protection.
Common DIY Ceramic Coating Mistakes That Can Damage Your Vehicle’s Paint
The biggest reason DIY ceramic coating goes wrong is poor preparation or incorrect application, which can leave streaks, high spots, or uneven gloss on the paint.
Common mistakes include:
- Skipping comprehensive paint corrections including swirl mark removal and defect elimination before coating
- Applying too much product
- Leaving coating to cure too long before buffing
- Using contaminated microfiber towels
- Poor attention to detail to identify potential high spots
These mistakes can create high spots that require polishing to remove. Taking your time during preparation and application greatly reduces the risk.
How Long Does Ceramic Coating Last and What Affects Durability?
DIY ceramic coating usually lasts between 1 and 3 years depending on product quality and maintenance.
Several factors affect durability:
- Quality of the ceramic coating product
- Preparation and polishing quality
- Washing routine and maintenance
- Environmental exposure
Typical durability comparison
| Coating Type | Average Lifespan |
| Spray ceramic coating | 6 – 12 months |
| DIY ceramic coating | 1 – 2 years |
| Professional ceramic coating | 4 – 7+ years |
Proper car care and regular washing help maintain hydrophobic protection and extend coating life.
When DIY Ceramic Coating Makes Sense for Your Car
DIY ceramic coating works best for drivers who want affordable paint protection and enjoy hands-on detailing.
It is especially suitable for newer cars with minimal paint defects. If your paintwork is already in good condition, DIY coating can improve gloss and provide excellent hydrophobic protection.
DIY coating also works well for daily drivers where the owner wants easier cleaning and moderate durability without spending thousands on professional services.
However, patience is essential. Successful DIY coatings require proper preparation, careful application, and attention to detail.
When You Should Call a Professional Detailer Instead
While DIY ceramic coating works for many cars, some situations require the experience and tools of a professional detailer.
Consider a professional detailer if:
- Your car has heavy swirl marks or scratches
- You own a luxury or collector vehicle
- You want multi-year durability and warranty protection
- You lack proper workspace for coating application
Professional detailers perform multi-stage comprehensive paint corrections including swirl mark removal and defect elimination before applying ceramic coatings. They also work in controlled environments with proper lighting and temperature.
This expertise significantly reduces the risk of application mistakes.
Maintenance Tips After Applying DIY Ceramic Coating
Proper maintenance is the key to making your DIY ceramic coating last longer and keep your car looking glossy.
Recommended maintenance routine
- Wash the car every 1–2 weeks using pH-neutral shampoo
- Use microfiber wash mitts and towels
- Avoid automatic brush car washes
- Apply ceramic booster sprays every few months
- Dry the vehicle properly to prevent water spots
Following these simple steps helps maintain hydrophobic properties, gloss, and durability.
Choosing the Best DIY Ceramic Coating Kit for Beginners
Not all ceramic coatings are the same. Some are designed for beginners, while others require advanced detailing experience.
Types of ceramic coatings available
- Spray ceramic coatings (easy but shorter durability)
- Wipe-on ceramic coatings (stronger protection)
- Hybrid ceramic sealants
What to look for in a good DIY coating
- Clear instructions and applicator included
- Good reviews from car care enthusiasts
- Durability claims between 1–3 years
- Reliable brand reputation
Choosing the best DIY ceramic coating helps beginners achieve better results.
Ceramic Coating vs Wax vs Paint Protection Film (PPF)
The main difference between wax, ceramic coating, and paint protection film (PPF) is how long they last and what type of protection they provide.
Each option protects your car’s paint in a different way. Wax gives short-term shine, ceramic coating provides longer-lasting chemical protection, and PPF protects against physical damage like rock chips.
Quick Comparison
| Protection Type | Durability | Protection Level |
| Wax | 1–2 months | Basic shine and light protection, no level of hardness |
| Ceramic Coating | 4–7 years | Strong chemical and UV protection, comes with hardness |
| Paint Protection Film (PPF) | 5–10 years | Physical protection from chips and scratches, lacks gloss |
What Each Protection Method Does
- Wax – Adds shine and a small amount of protection, but it wears off quickly and needs frequent reapplication.
- Ceramic Coating – Creates a durable, hydrophobic layer that improves gloss, repels water, and makes the car easier to clean.
- Paint Protection Film (PPF) – A thick, transparent film applied to the paint that protects against stone chips, scratches, and road debris.
Ceramic coating is often the best choice for drivers who want long-lasting gloss, easier cleaning, and strong paint protection. However, if you want protection from rock chips or physical damage, PPF provides the strongest defence.
Conclusion
DIY ceramic coating can be a rewarding way to improve your vehicle’s paint protection and gloss without spending thousands on professional services. With the right preparation, tools, and patience, many car owners achieve impressive results at home.
However, DIY coatings require attention to detail and realistic expectations. Professional coatings still offer superior durability, expert comprehensive paint corrections including swirl mark removal and defect elimination, and warranty coverage.
For enthusiasts who enjoy car care, ceramic coating DIY is a great option. For high-value vehicles or long-term protection, a professional detailer may still be the best choice.
FAQs
Can you apply ceramic coating yourself at home?
Yes. Many DIY ceramic coating kits are designed for home use. With proper preparation and careful application, beginners can successfully apply ceramic coating themselves.
Is DIY ceramic coating as good as professional coating?
DIY coatings can provide excellent protection, but professional coatings usually last longer and include comprehensive paint corrections including swirl mark removal and defect elimination and warranty coverage.
How much does ceramic coating DIY cost?
DIY ceramic coating kits typically cost between $150 and $200, for the kit alone. But to consider the initial purchase of equipment and supplies, expect another $1000 outlay for a DA machine polisher, polishing compound, foam polishing pads, microfibre towels, a pressure washer, hose extension, IPA panel cleanse, clay bars, drying microfibre towels and so forth.
How long does DIY ceramic coating last?
Most DIY ceramic coatings last 1–2 years, depending on the product and maintenance routine.
Does ceramic coating make your car easier to clean?
Yes. Ceramic coatings create hydrophobic properties that repel water and dirt, making washing easier and reducing the buildup of grime.
Hi, I’m David
author, Automotive tech expert

I am a proficient writer with a preference in creating engaging and informative car content, particularly focused on the Australian automotive industry. With a relentless hunger to deliver to car owners and drivers across the world with the latest emerging trends and innovations in the car space, you have tuned into the right place.